Uploading Zipped Files
Step by step process to zipping (compressing) and uploading images to Presto Photo
Uploading Zipped Files
Uploading Zipped Files
Below are two seperate tutorials, one for Windows, and one for Mac operating systems. Click on the operating system you are currently using for a guided view on how to create a zip file and upload it to your My Photos page.
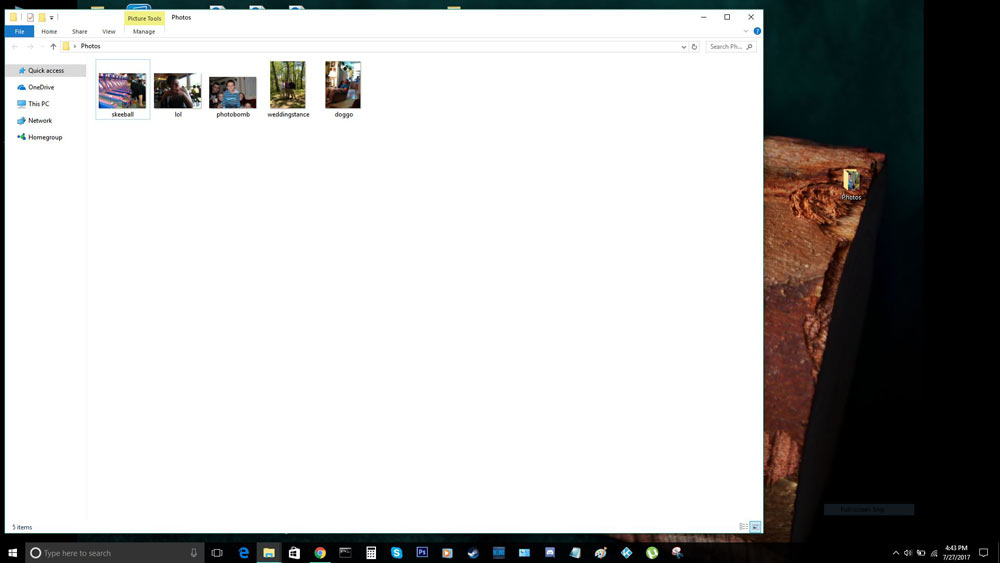
1. Find files to zip
Find your photo files on your computer, if they aren't as organized as they are here, copy them and place them in a new folder by themselves.
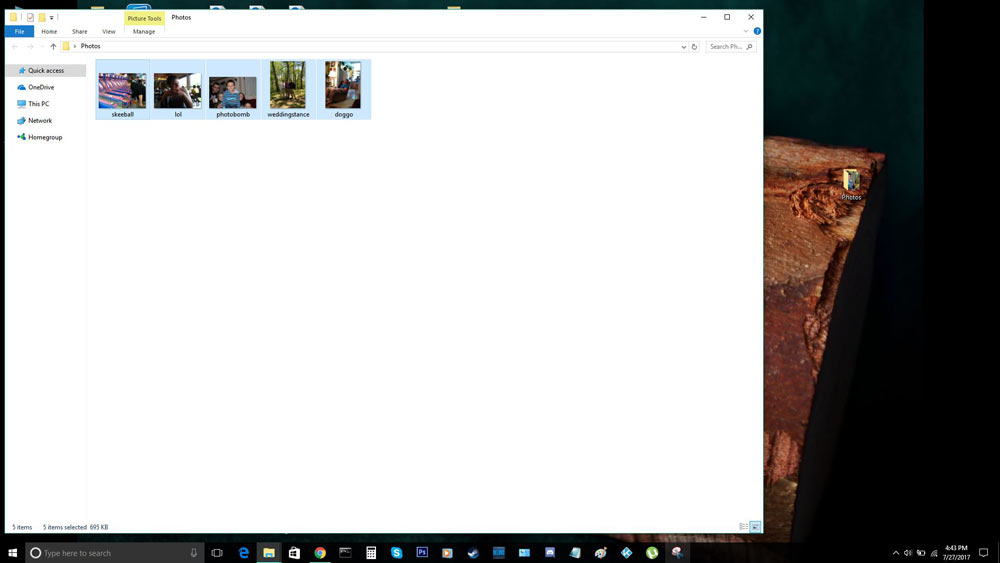
2. Select
Select only the files you want to zip and upload to the website.
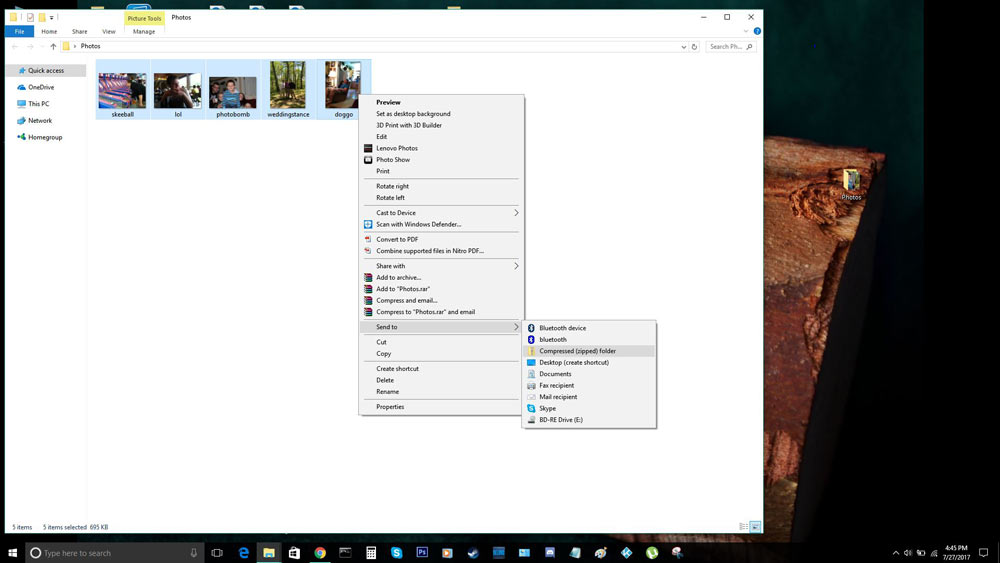
3. Compress
Right click on the files that you want to ZIP, and follow the menu to Send To, then Compressed (zipped) folder.
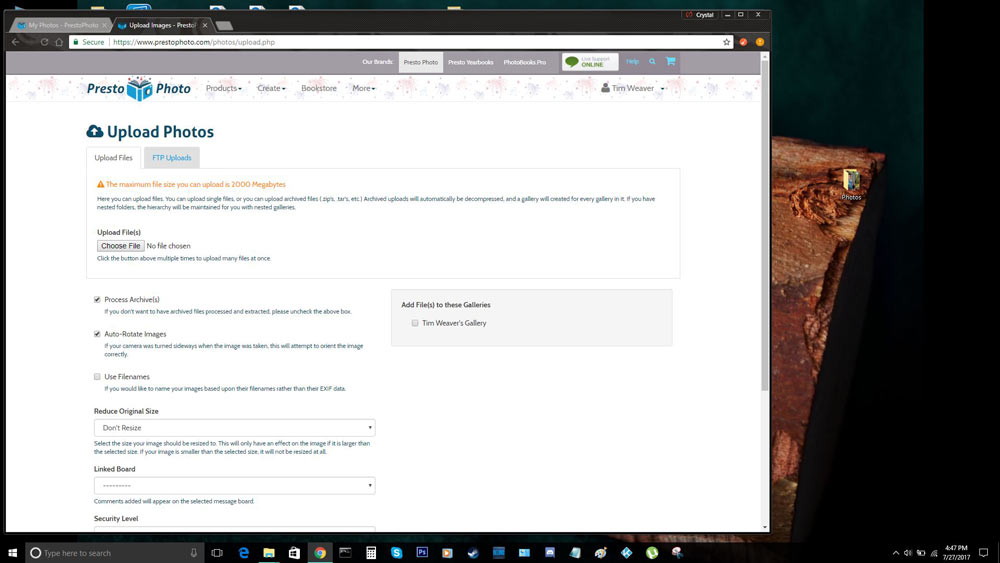
4. Choose Files
Navigate to the My Photos page on the website, click on Upload Zipped files, then click on Choose File to progress.
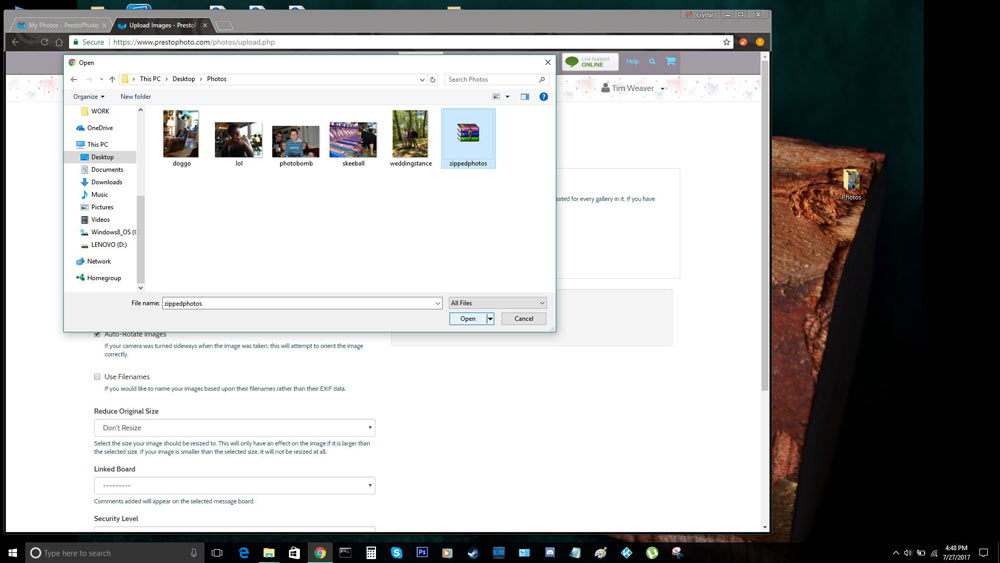
5. Upload Files
In the pop up window go to where you stored your zipped photos file, and select it.
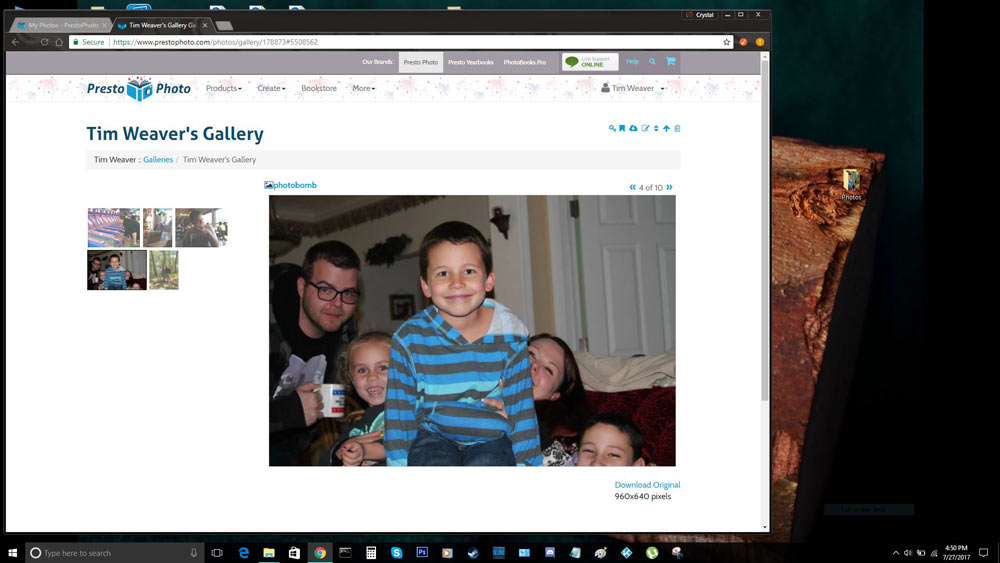
6. Finished!
Your files are now uploaded to your gallery! For a moment they will display placeholder images while they process, but upon reload they should show up just fine.
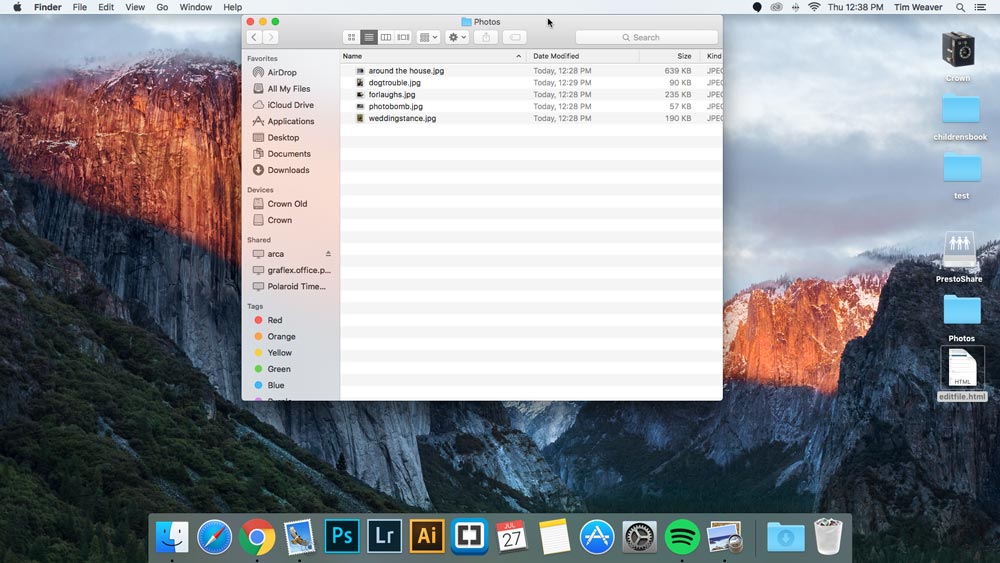
1. Find files to zip
Find your photo files on your computer, if they aren't as organized as they are here, copy them and place them in a new folder by themselves.
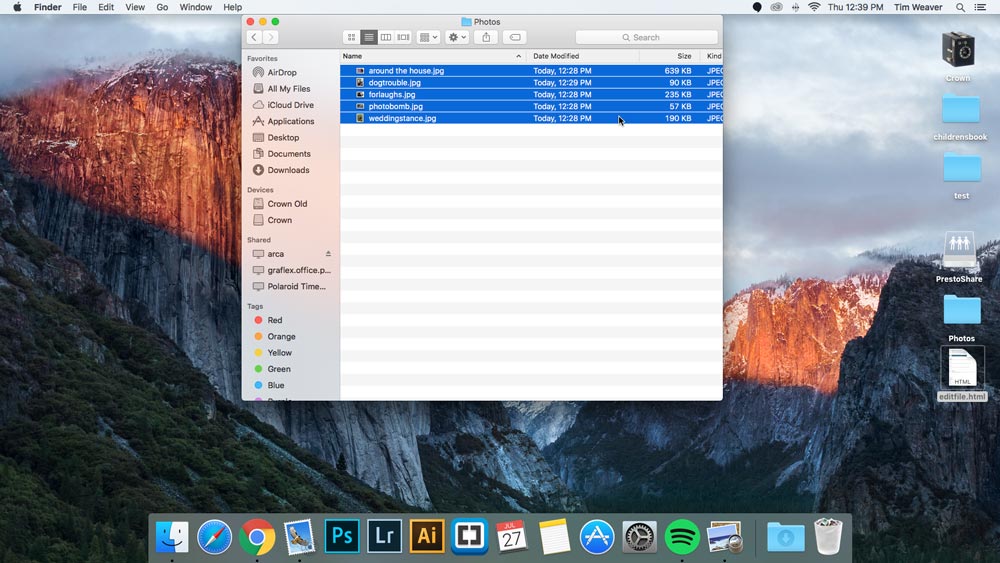
2. Select
Select only the files you want to zip and upload to the website.
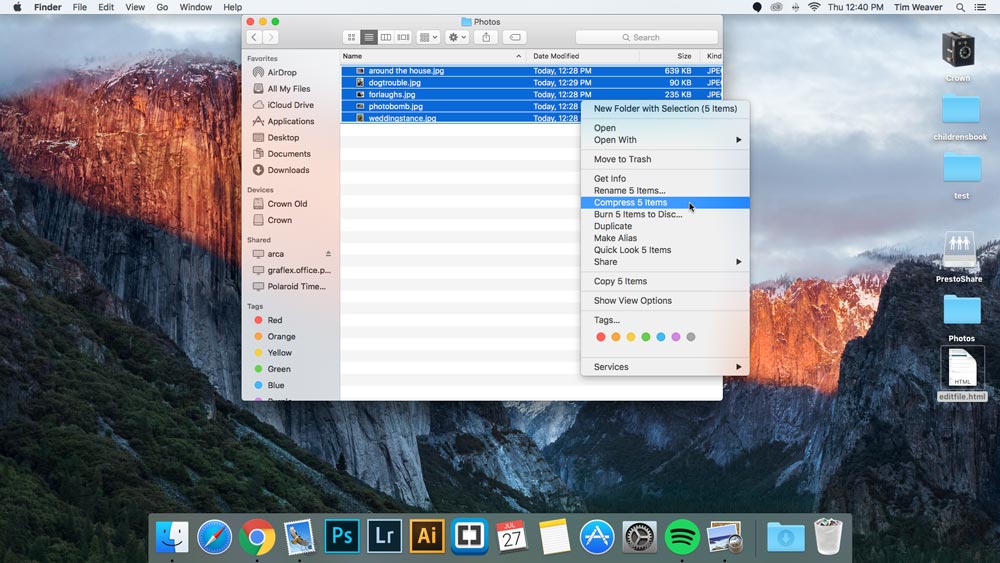
3. Compress
Right click on the files that you want to ZIP, and select Compress.
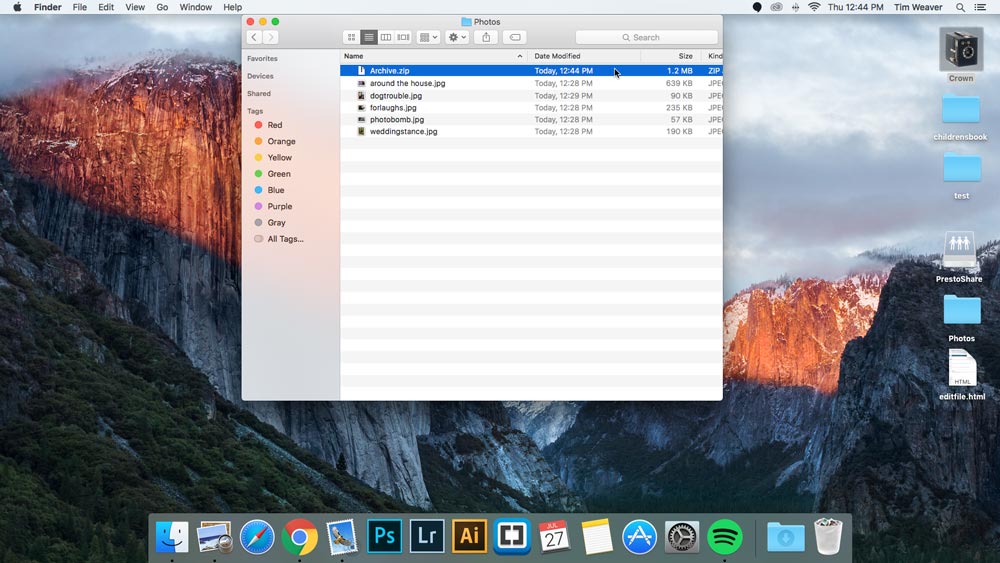
4. Zip File Created
You have now created a Zip file! It should be located in the same location as your photos.
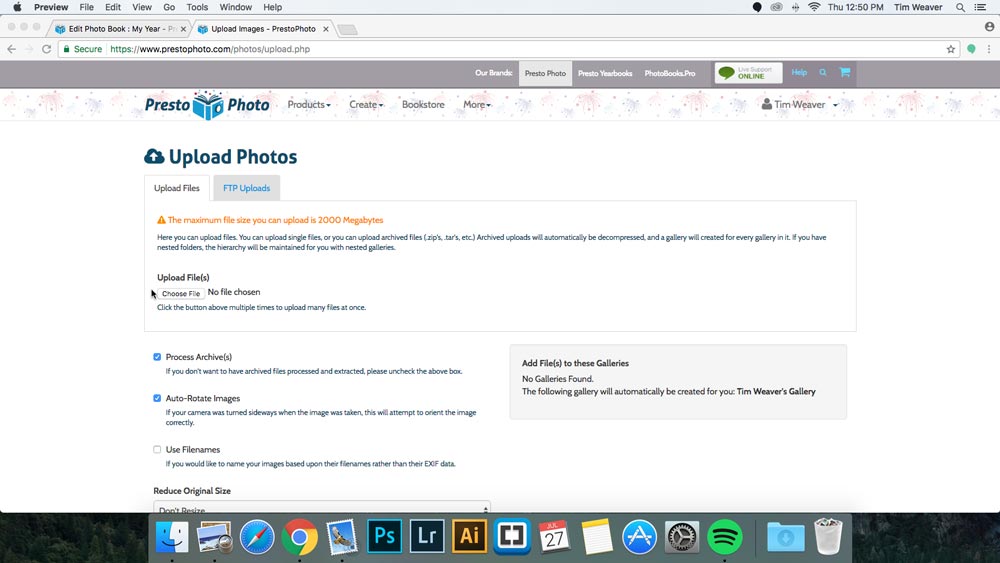
5. Choose File
Navigate to the My Photos page on the website, click on Upload Zipped files, then click on Choose File to progress.
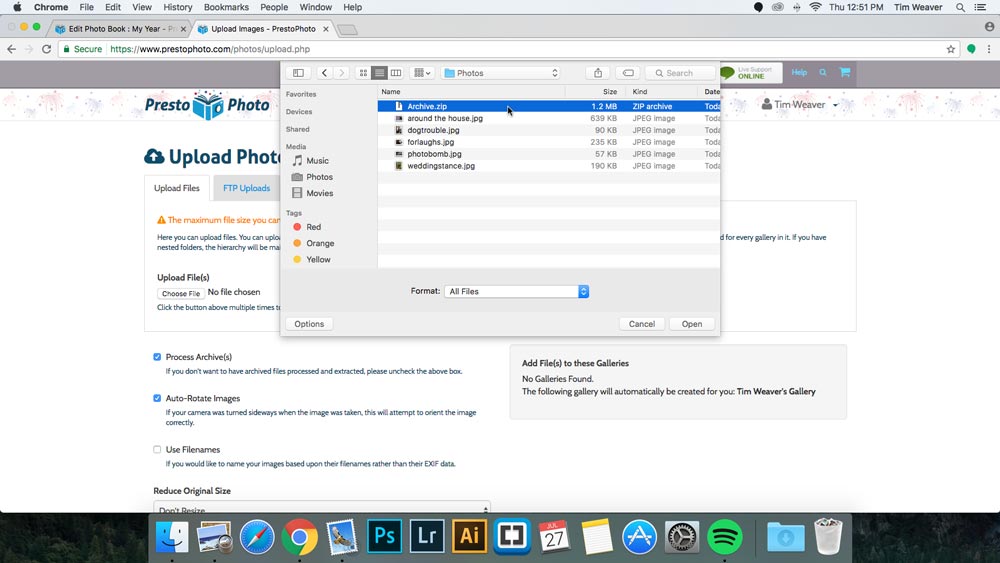
6. Find your zipped files
In the pop up window go to where you stored your zipped photos file, and select it.
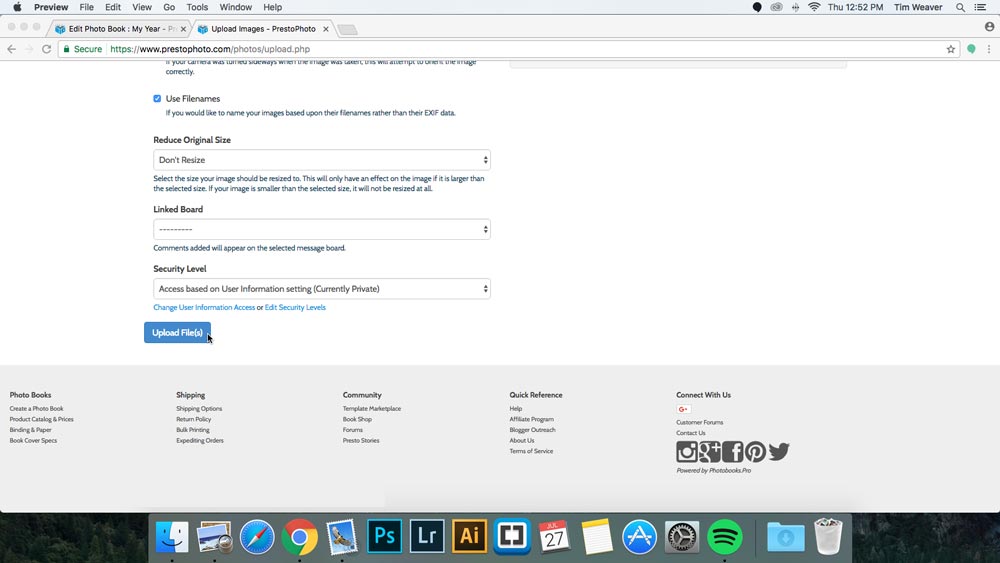
7. Upload Files
Click on Upload File(s) and wait a moment for everything to process.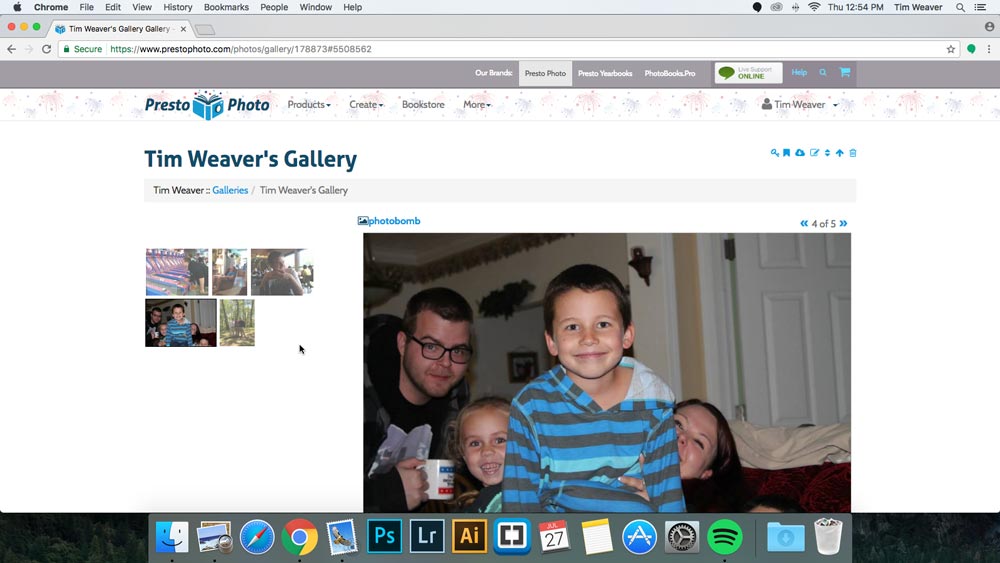
8. Finished!
Your files are now uploaded to your gallery! For a moment they will display placeholder images while they process, but upon reload they should show up just fine.
